Flic Twist and Home Assistant for Twist Events
-
TL;DR: If you use Home Assistant, getting programmatic access to Flic Twist events is doable.

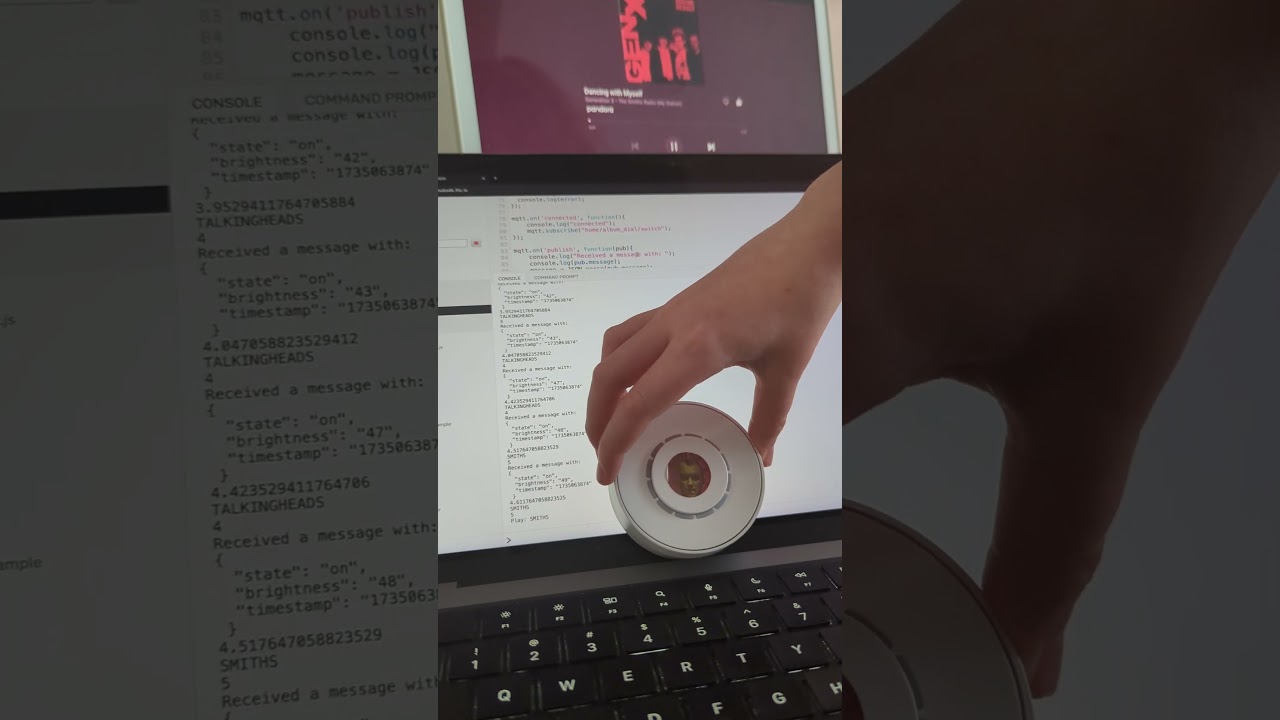
https://youtube.com/shorts/vk94HH6OKEI?si=wHioNnW3-7Nc5gYW
This video shows using the twist events to switch pandora radio stations. Each of the 25 clicks on the twist is a station.
These instructions are my best recollection of setting it up and not what actually happened. If you run into something that isn’t right, I’m happy to update this post or answer a question.
ALSO: If you know of a simpler way to work programmatically with the Flic Twist, please let me know! This was born from me wondering if it would take less time to do this than to keep checking this forum to see if the Twist SDK was available yet.
- Have Home Assistant: I use Home Assistant OS on a Raspberry Pi 4.
- Add Matterbridge: Install Matterbridge to connect Flic devices with Home Assistant. Follow the setup to get a QR code and register your devices in the Flic app under “Providers -> Matter.” Matterbridge expos
https://github.com/t0bst4r/matterbridge-home-assistant-addon?tab=readme-ov-file - Configure a Virtual Light:
- Install the Home Assistant File Editor.
https://github.com/home-assistant/addons/blob/master/configurator/DOCS.md - Edit configuration.yaml to add a virtual light. Example configuration:
light:
  - platform: template
    lights:
      album_dial:
        friendly_name: "Album Dial"
        level_template: "{{ states('input_number.album_dial_brightness') | int }}"
        value_template: "{{ is_state('input_boolean.album_dial_switch', 'on') }}"
        turn_on:
          - service: input_boolean.turn_on
            target:
              entity_id: input_boolean.album_dial_switch
          - service: input_number.set_value
            target:
              entity_id: input_number.album_dial_brightness
            data:
              value: 255
        turn_off:
          service: input_boolean.turn_off
          target:
            entity_id: input_boolean.album_dial_switch
        set_level:
          - service: input_boolean.turn_on
            target:
              entity_id: input_boolean.album_dial_switch
          - service: input_number.set_value
            target:
              entity_id: input_number.album_dial_brightness
            data_template:
              value: "{{ brightness }}"
4. Restart Home Assistant. Your virtual light (album_dial) should appear in the Matterbridge logs. 5. Link Flic Twist to Virtual Light: In the Flic app, go to your Twist settings -> Brightness -> Link to album_dial. Turning the dial now adjusts the brightness.Optional: Use MQTT for Custom Events
If you want to integrate with the Flic Hub or other systems, publish MQTT events from Home Assistant:
- Install Mosquitto Broker: Add the Mosquitto addon in Home Assistant.
- Set up Automation: Edit automations.yaml to publish events to MQTT:
- id: publish_album_dial_to_mqtt alias: Publish Album Dial State to MQTT trigger: - platform: state entity_id: light.album_dial action: - service: mqtt.publish data: topic: home/album_dial/switch payload: > { "state": "{{ 'on' if state_attr('light.album_dial', 'brightness') | int > 0 else 'off' }}", "brightness": "{{ state_attr('light.album_dial', 'brightness') | int }}", "timestamp": "{{ now().timestamp() | int }}" } retain: true- Restart Home Assistant: You should now see MQTT events in the logs or an MQTT client like MQTT Explorer.
Flic Hub Integration Example
If you want to work with the Flic Hub, you can subscribe to these MQTT events:
1. Start a Flic Hub Project: Use flic-hub-sdk-mqtt-js.
2. Subscribe to MQTT Events: Example main.js script:var mqtt = require("./mqtt").create("HOME_ASSISTANT_IP", { port: 1883 }); mqtt.on("connected", function () { console.log("Connected"); mqtt.subscribe("home/album_dial/switch"); }); mqtt.on("publish", function (pub) { console.log("Received: ", pub.message); // Example: const message = JSON.parse(pub.message); }); mqtt.connect();Hope this helps someone!
-
@sgemmen Thanks for this, finally got around to setting it up. It wasn't working at first but realised I needed to add the two helpers (boolean and number) for the targets of the service.
Now I need to work on using it to adjust all the lights in a room while keeping the relative brightness of them the same.
EDIT: Found this add-on which seems to work - https://community.home-assistant.io/t/relative-brightness-light-group/695450 - brightness changes are a bit jerky (not sure if this related to flic, the add-on, or something else) but it does the job for now.